
First aid for dogs and cats
The RECOVER 2026 guidelines are an international, evidence-based consensus on giving first aid to animals before they reach a veterinary practice. They include five "Recognise and Act" algorithms and six instructional illustrations that help owners recognise a threat and take the right action before the animal comes under veterinary care.
Educational material for animal owners — it does not replace veterinary assessment and help. In every case, the animal should be taken to the nearest open veterinary practice.
Five algorithms
Algorithm 1 · generalGeneral first aid algorithm
Signs that link recognised problems to a specific action.
Signs that any owner can notice, linked to specific problems where first aid matters. Every reported concern — with one exception — leads to one place: the nearest open veterinary practice.
Mandell DC, Thawley VJ, Burkitt-Creedon JM, Fletcher DJ, Boller M, Fausak E. "RECOVER Guidelines: First Aid for Dogs and Cats. Clinical Guidelines." Journal of Veterinary Emergency and Critical Care, 2026. — Figure 2. Educational material — it does not replace veterinary help.
Algorithm 2 · heatstrokeHeatstroke and overheating
Recognising overheating and cooling before transport.
Helps you recognise overheating in a dog or cat and start cooling before the animal reaches the practice. Heatstroke can also occur at moderate temperatures — during running, play or work.
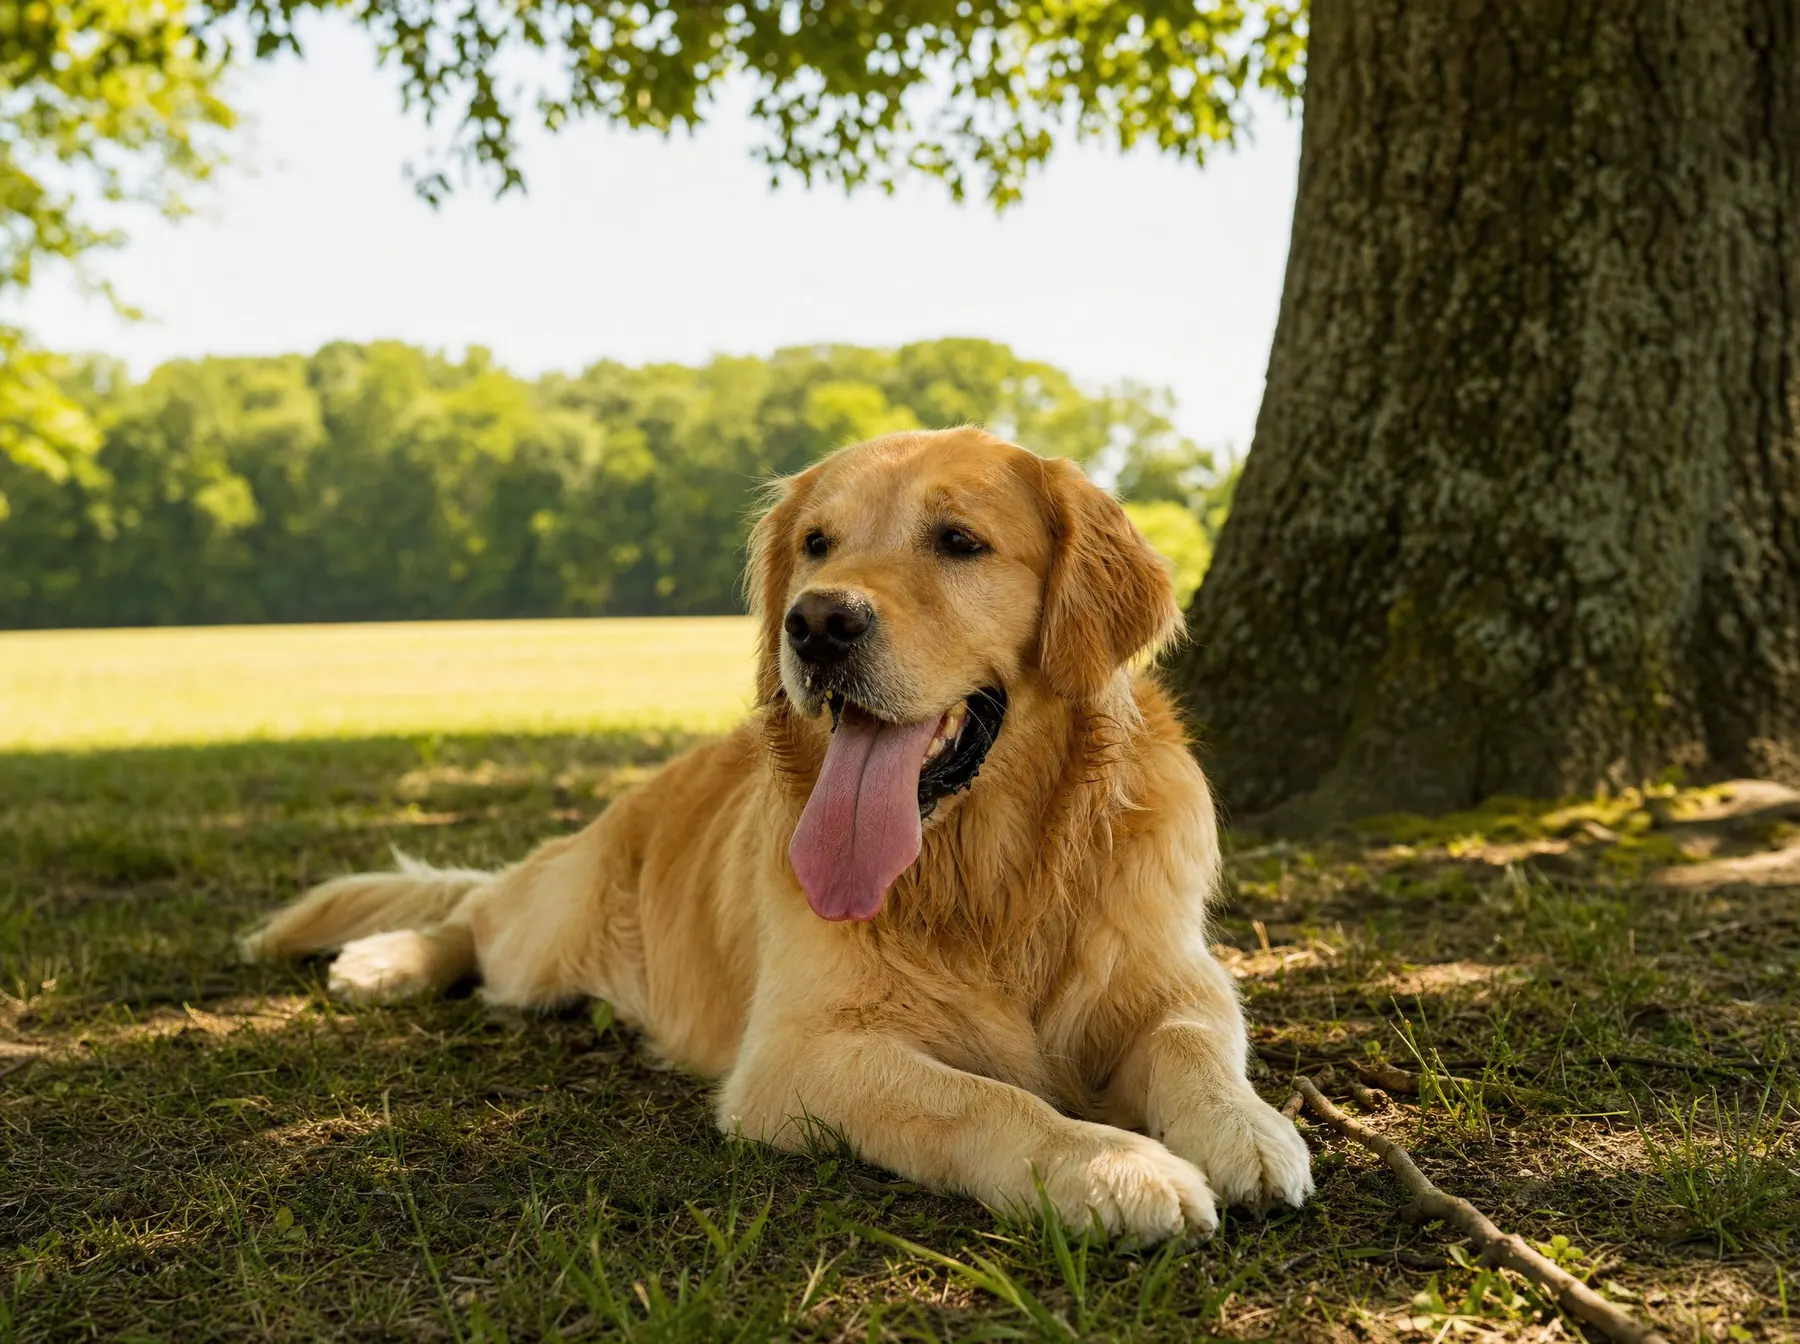 Heavy panting
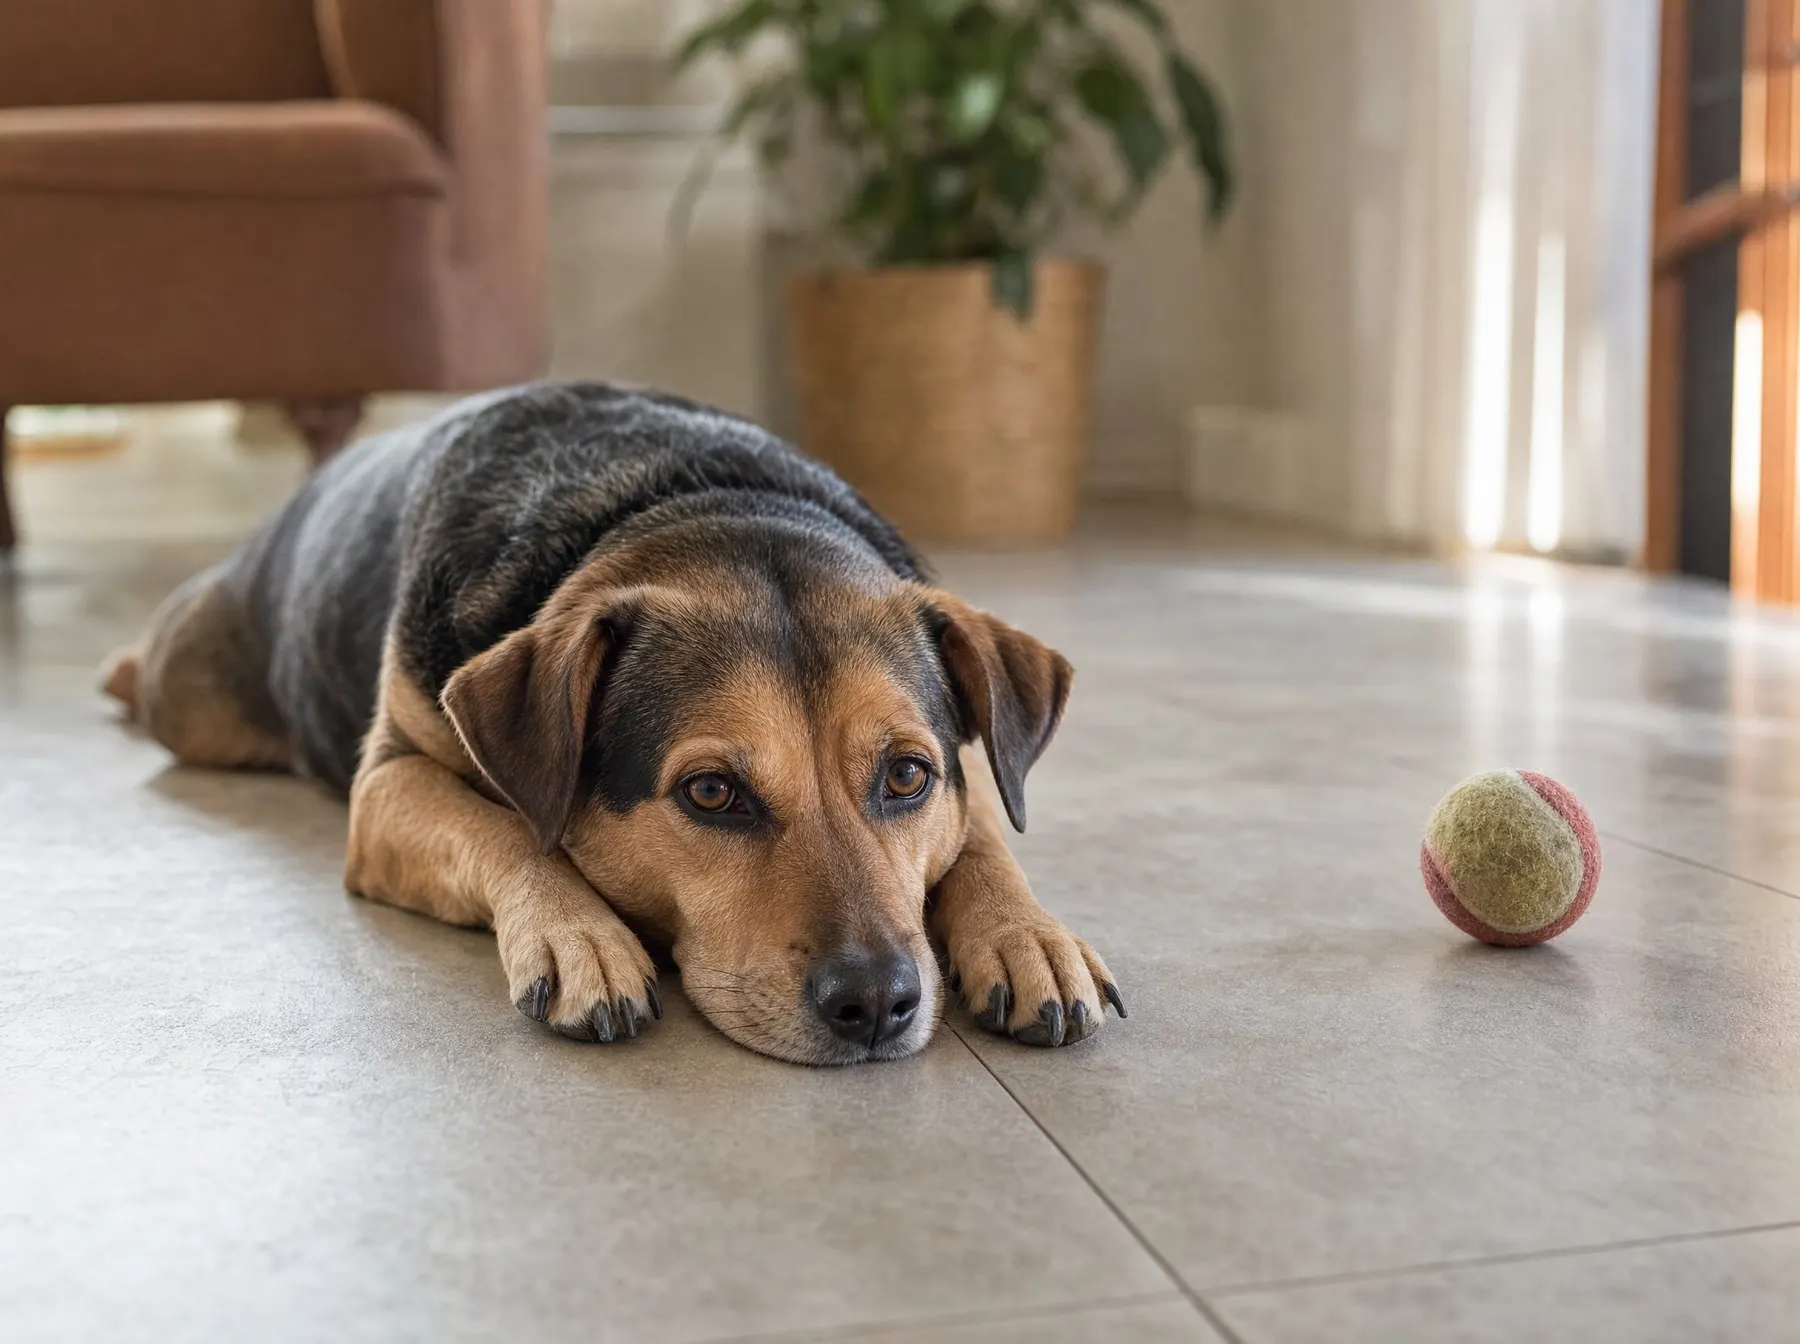 Withdrawal from activity
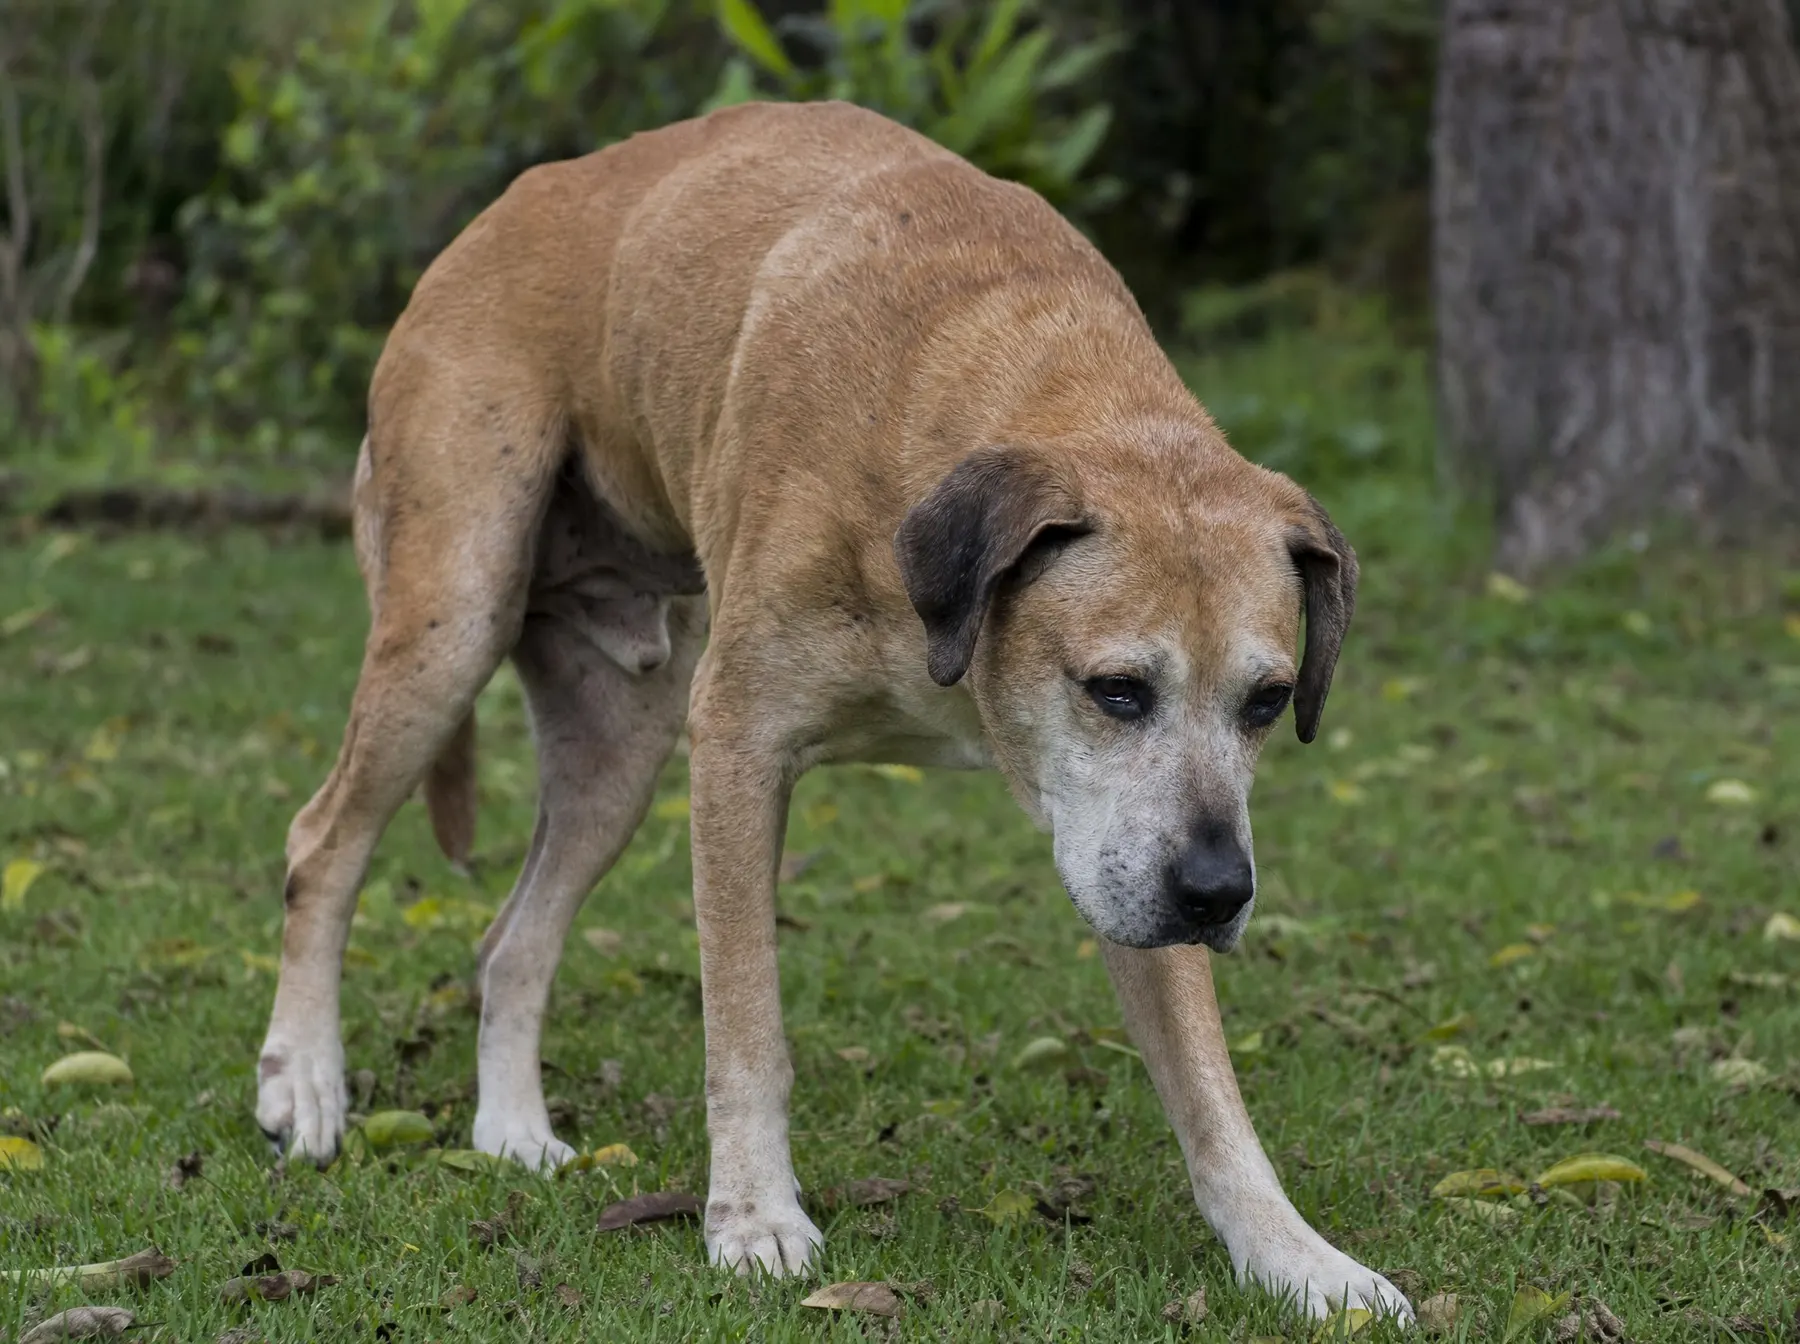 Disorientation
- Constant, heavy panting in a dog (in a cat with or without an open mouth)
- Sudden reluctance to play or be active
- Lying down at an unusual moment during activity
- Withdrawing from work
- Anxious facial expression, restlessness
- Disorientation, staggering
- Excessive drooling, vomiting or diarrhoea
- Collapse
Mandell DC, Thawley VJ, Burkitt-Creedon JM, Fletcher DJ, Boller M, Fausak E. "RECOVER Guidelines: First Aid for Dogs and Cats. Clinical Guidelines." Journal of Veterinary Emergency and Critical Care, 2026. — Figure 4. Educational material — it does not replace veterinary help.
Algorithm 3 · chokingChoking — foreign body in the airway
Back blows, alternative techniques and CPR.
Complete airway obstruction is fatal within minutes, so a rapid response by a bystander is decisive.
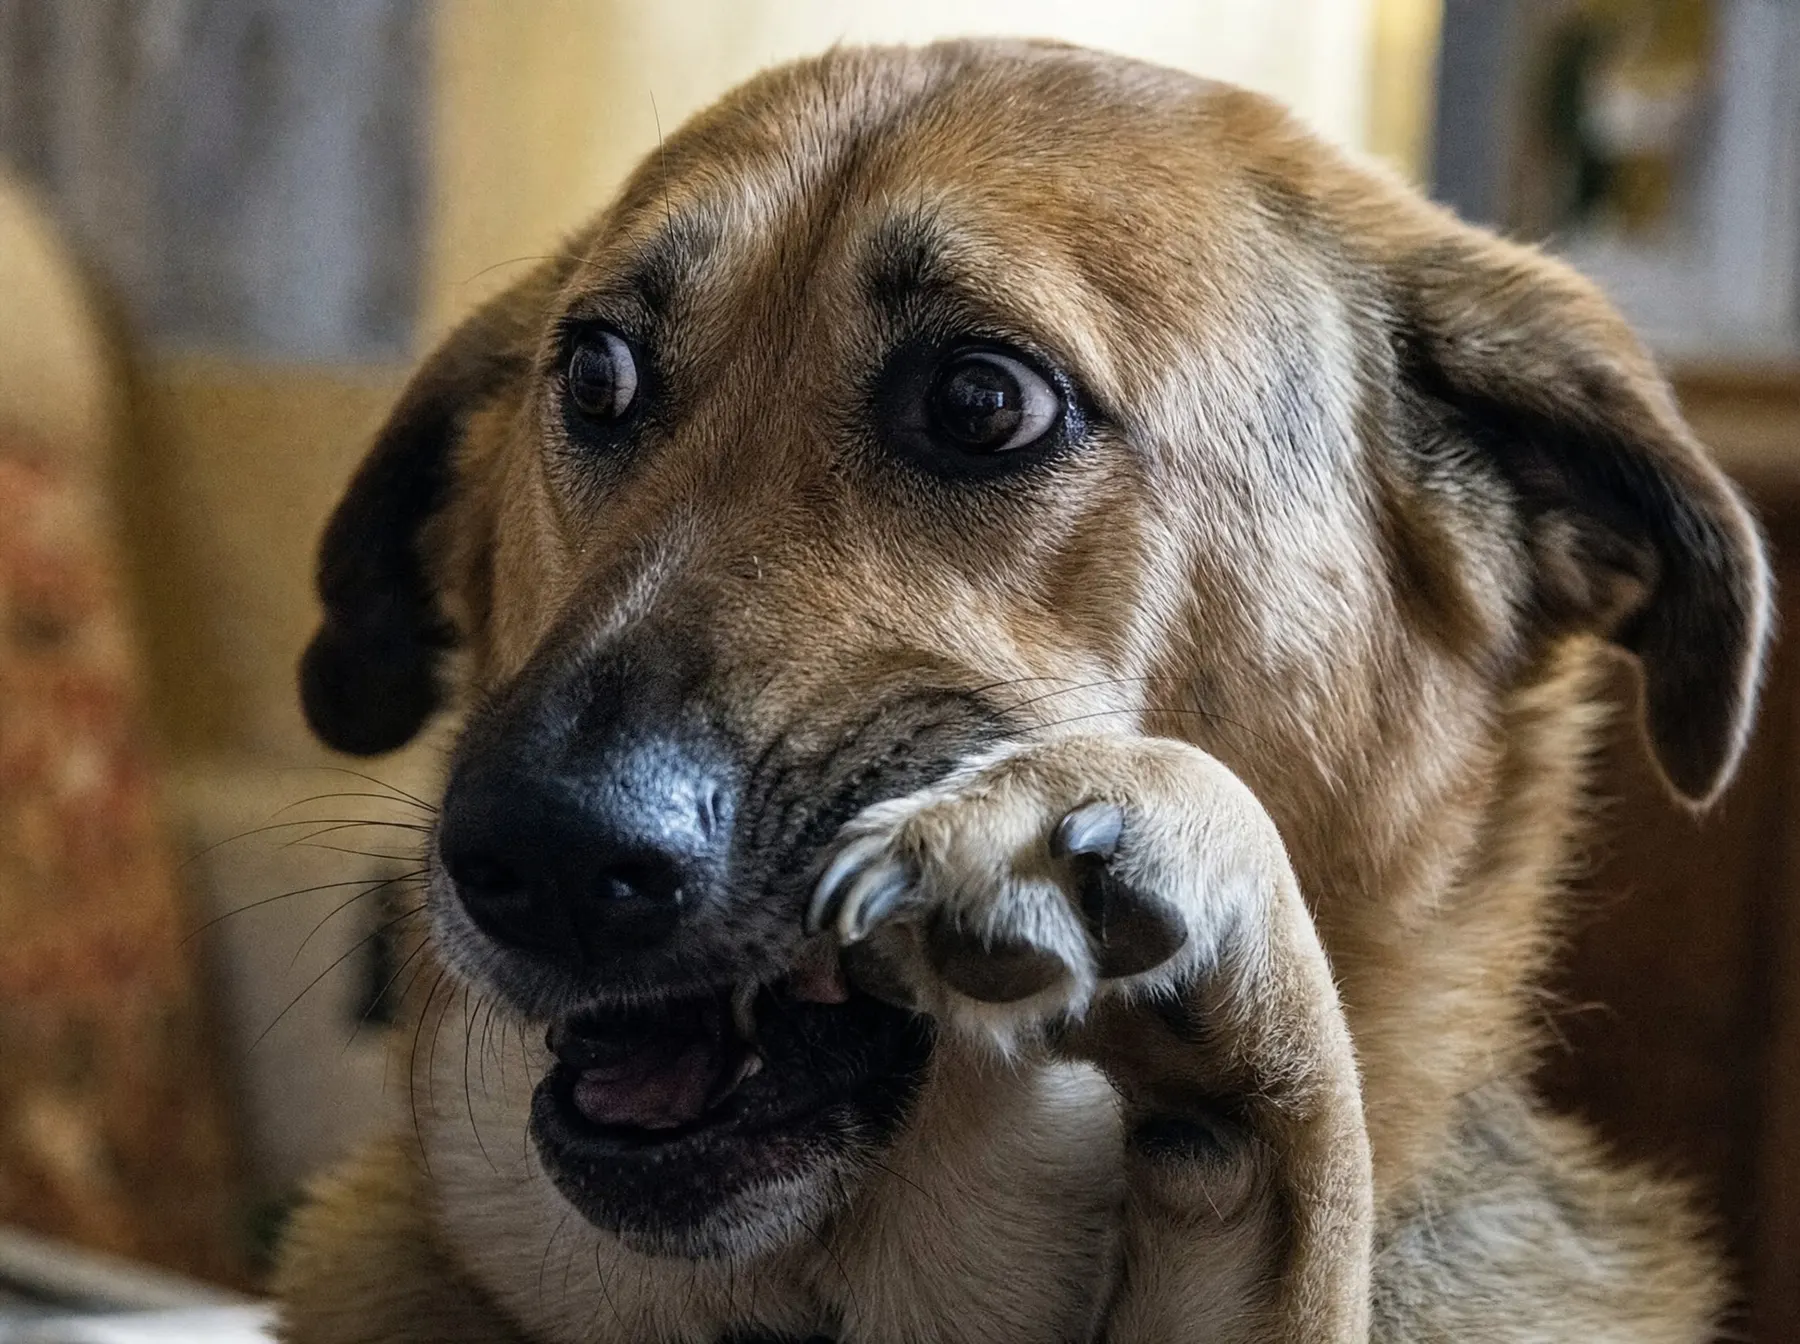 Pawing at the mouth
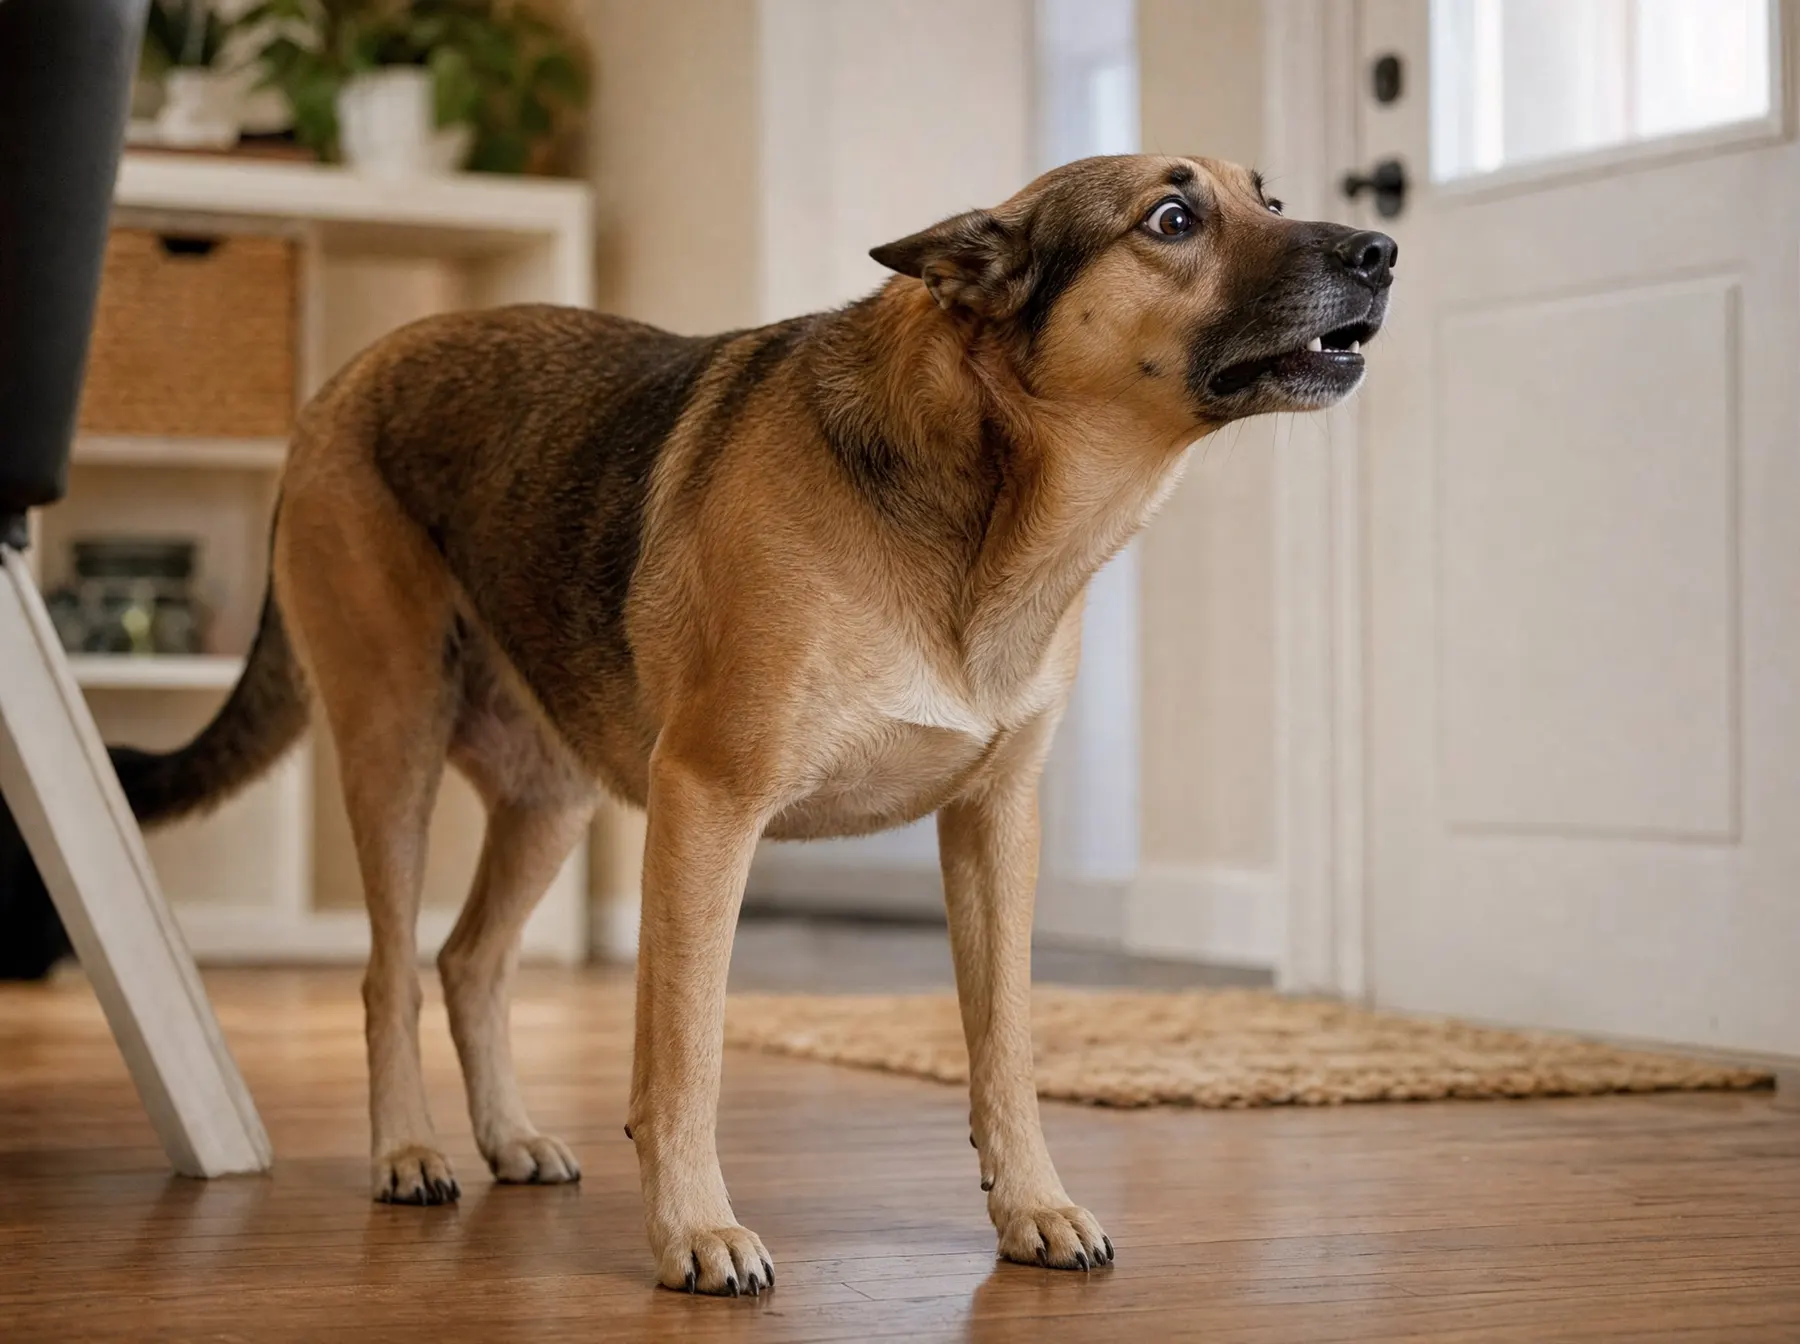 Head and neck extended
- Agitation, pawing at the mouth
- Head and neck extended
- Weak or absent cough sound when trying to cough or gag
- High-pitched, squeaky sound when trying to breathe
- Pale or bluish mucous membranes
- Excessive drooling
Mandell DC, Thawley VJ, Burkitt-Creedon JM, Fletcher DJ, Boller M, Fausak E. "RECOVER Guidelines: First Aid for Dogs and Cats. Clinical Guidelines." Journal of Veterinary Emergency and Critical Care, 2026. — Figure 8. Educational material — it does not replace veterinary help.
Algorithm 4 · CPRCPR away from the practice — first responder with equipment
Resuscitation with a self-inflating bag and mask.
For helpers and first responders equipped with a self-inflating bag and a mask that fits tightly over the animal's muzzle. The procedure is analogous to the bystander algorithm, with one key difference: how the breaths are delivered.
Editorial note from the practice: in resuscitation, the most important thing is uninterrupted chest compressions — interrupt them only for breaths and, if there is a second person, swap roughly every 2 minutes, because fatigue quickly reduces the effectiveness of compressions. During opening hours, phone the practice before you set off so that we can prepare the team; outside opening hours, on Sundays and on public holidays, go to the nearest 24-hour animal hospital (addresses on the Contact page). If another veterinary facility is closer than we are, go there — travel time is what counts.
Mandell DC, Thawley VJ, Burkitt-Creedon JM, Fletcher DJ, Boller M, Fausak E. "RECOVER Guidelines: First Aid for Dogs and Cats. Clinical Guidelines." Journal of Veterinary Emergency and Critical Care, 2026. — Figure 9. Educational material — it does not replace veterinary help.
Algorithm 5 · CPRCPR away from the practice — bystander
Resuscitation without equipment: compressions and mouth-to-nose breaths.
For owners, handlers and helpers without medical equipment who have found a dog or cat unconscious and not breathing normally.
Editorial note from the practice: in resuscitation, the most important thing is uninterrupted chest compressions — interrupt them only for breaths and, if there is a second person, swap roughly every 2 minutes, because fatigue quickly reduces the effectiveness of compressions. During opening hours, phone the practice before you set off so that we can prepare the team; outside opening hours, on Sundays and on public holidays, go to the nearest 24-hour animal hospital (addresses on the Contact page). If another veterinary facility is closer than we are, go there — travel time is what counts.
Mandell DC, Thawley VJ, Burkitt-Creedon JM, Fletcher DJ, Boller M, Fausak E. "RECOVER Guidelines: First Aid for Dogs and Cats. Clinical Guidelines." Journal of Veterinary Emergency and Critical Care, 2026. — Figure 10. Educational material — it does not replace veterinary help.
Six illustrations
Illustration 1 of 6Applying carbohydrate to the mucous membrane
First aid for hypoglycaemia.
First aid for hypoglycaemia: a sticky, simple carbohydrate (corn syrup, glucose gel, honey) applied to the mucous membrane between the premolar teeth and the cheek.
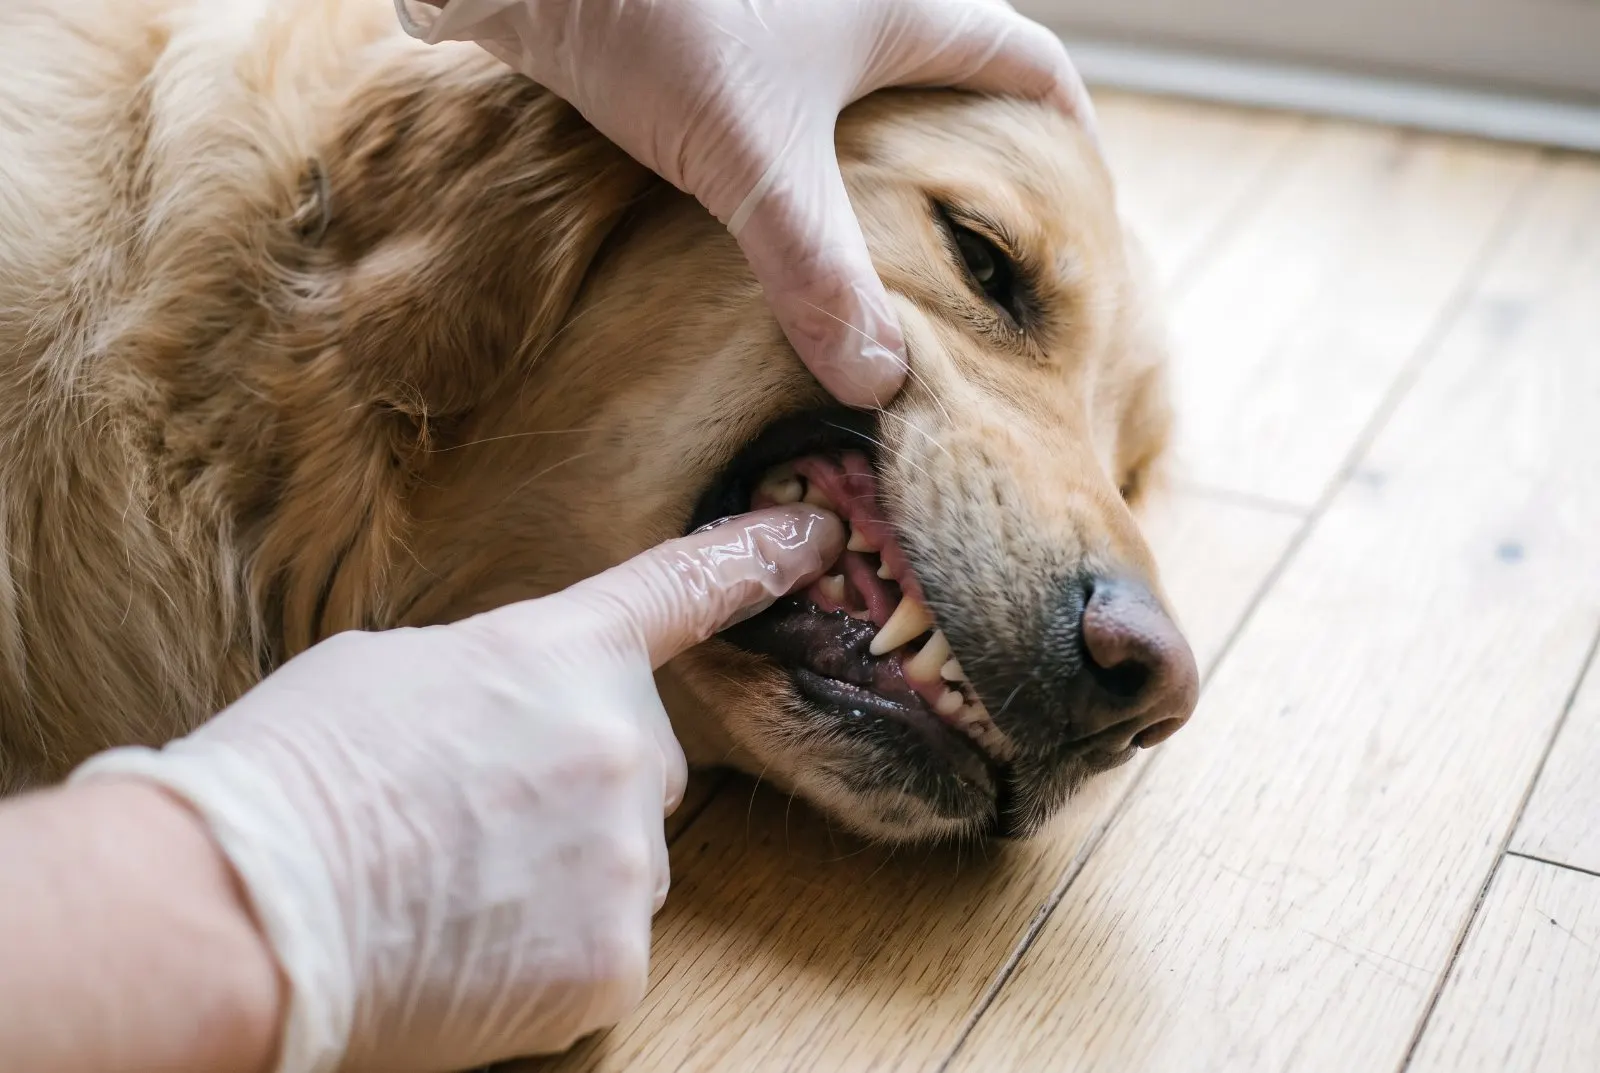 Hypoglycaemia
- Give 0,2–10 ml — an amount scaled to the size of the animal (up to about 2 teaspoons).
- Apply the carbohydrate to the mucous membrane between the upper premolar/molar teeth and the cheek.
- Aim: to coat a large area of mucous membrane, not to make the animal swallow the liquid.
- Do not give anything by mouth or onto the mucous membrane if the animal is having an active seizure.
- Do not do this if it poses a risk to the owner (for example, risk of being bitten).
- Animals receiving insulin (most common)
- Puppies and kittens in the neonatal period (most common)
- Insulinoma; paraneoplastic syndromes
- Xylitol ingestion in dogs
- Pregnancy and birth
Mandell DC, Thawley VJ, Burkitt-Creedon JM, Fletcher DJ, Boller M, Fausak E. "RECOVER Guidelines: First Aid for Dogs and Cats. Clinical Guidelines." Journal of Veterinary Emergency and Critical Care, 2026. — Figure 3. Educational material — it does not replace veterinary help.
Illustration 2 of 6Methods of cooling an overheated dog
Three variants of active cooling in the field.
Three variants of active cooling available in different settings — choose the method to suit the conditions you are in.
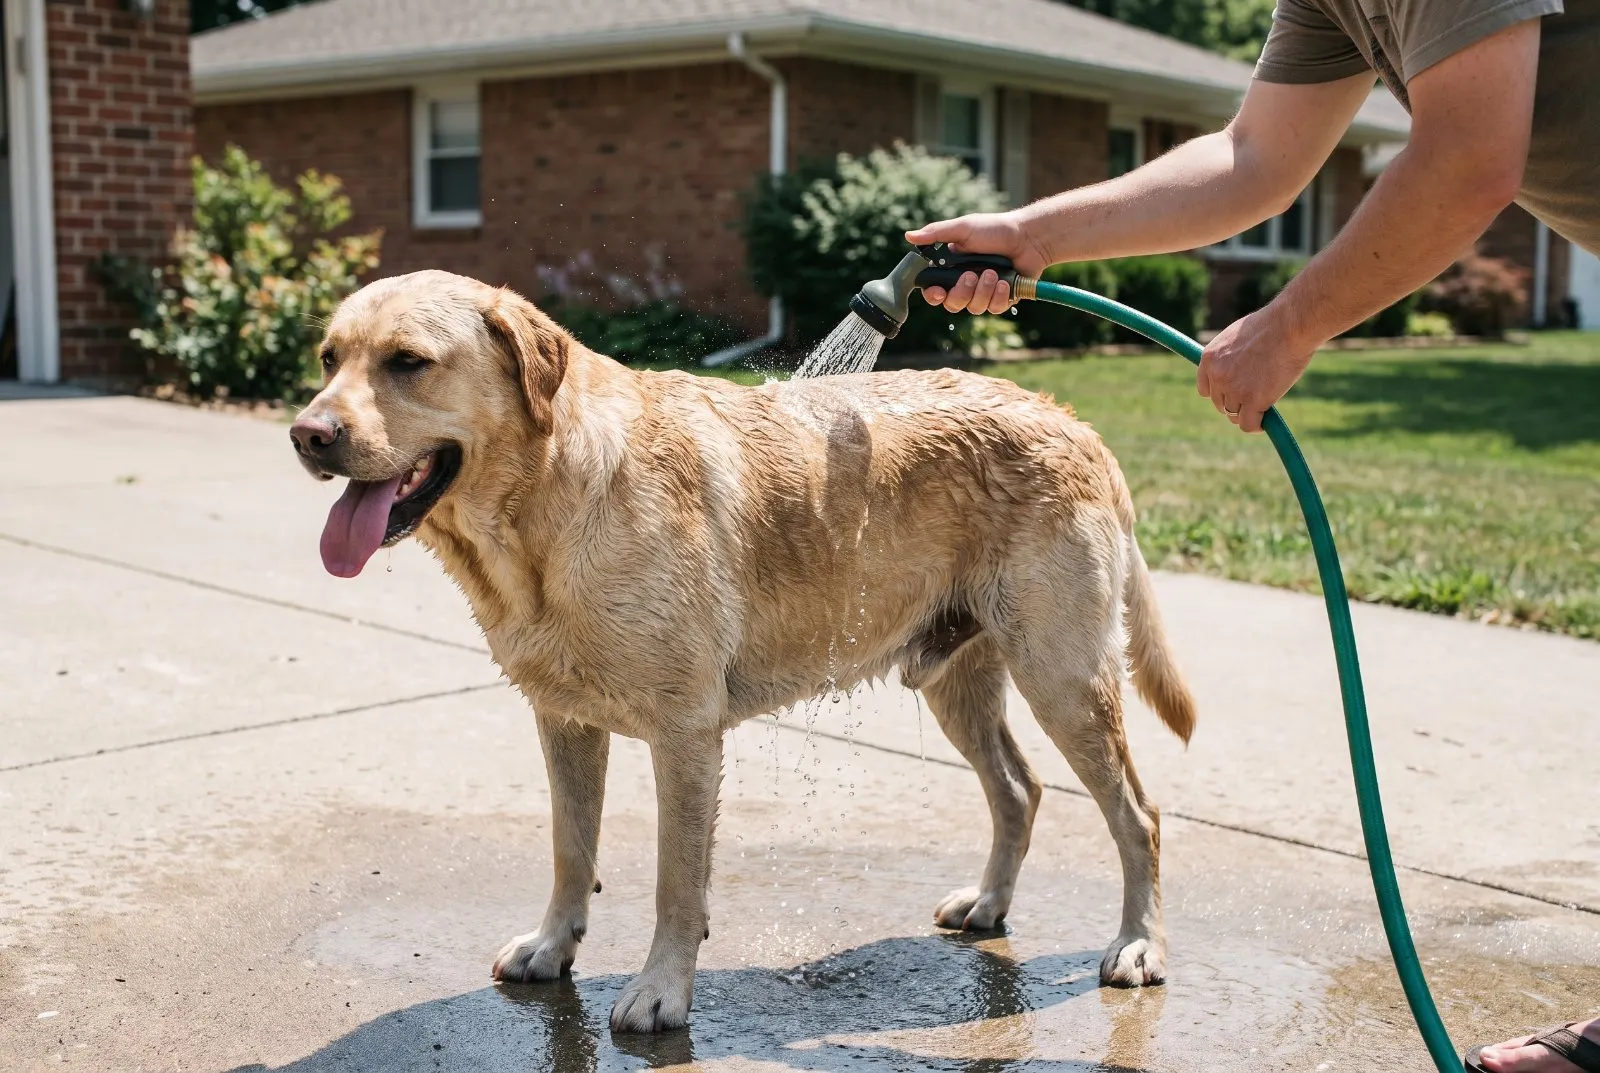 Water from a hose
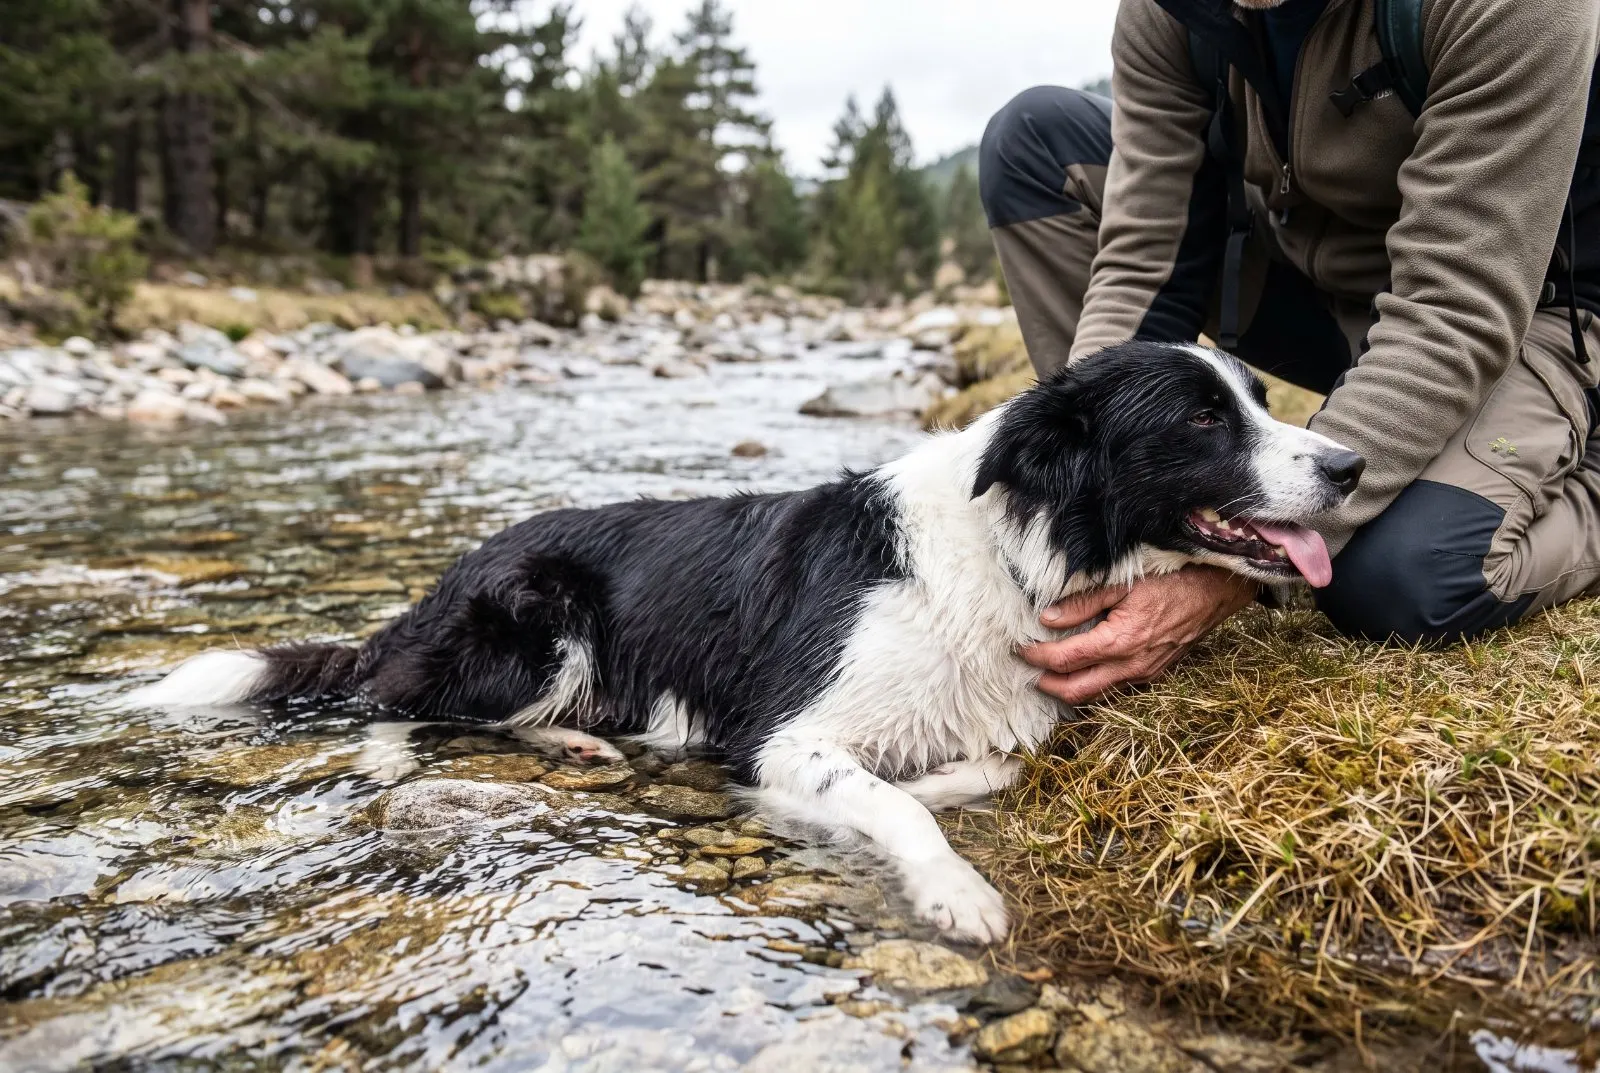 Immersing the hindquarters
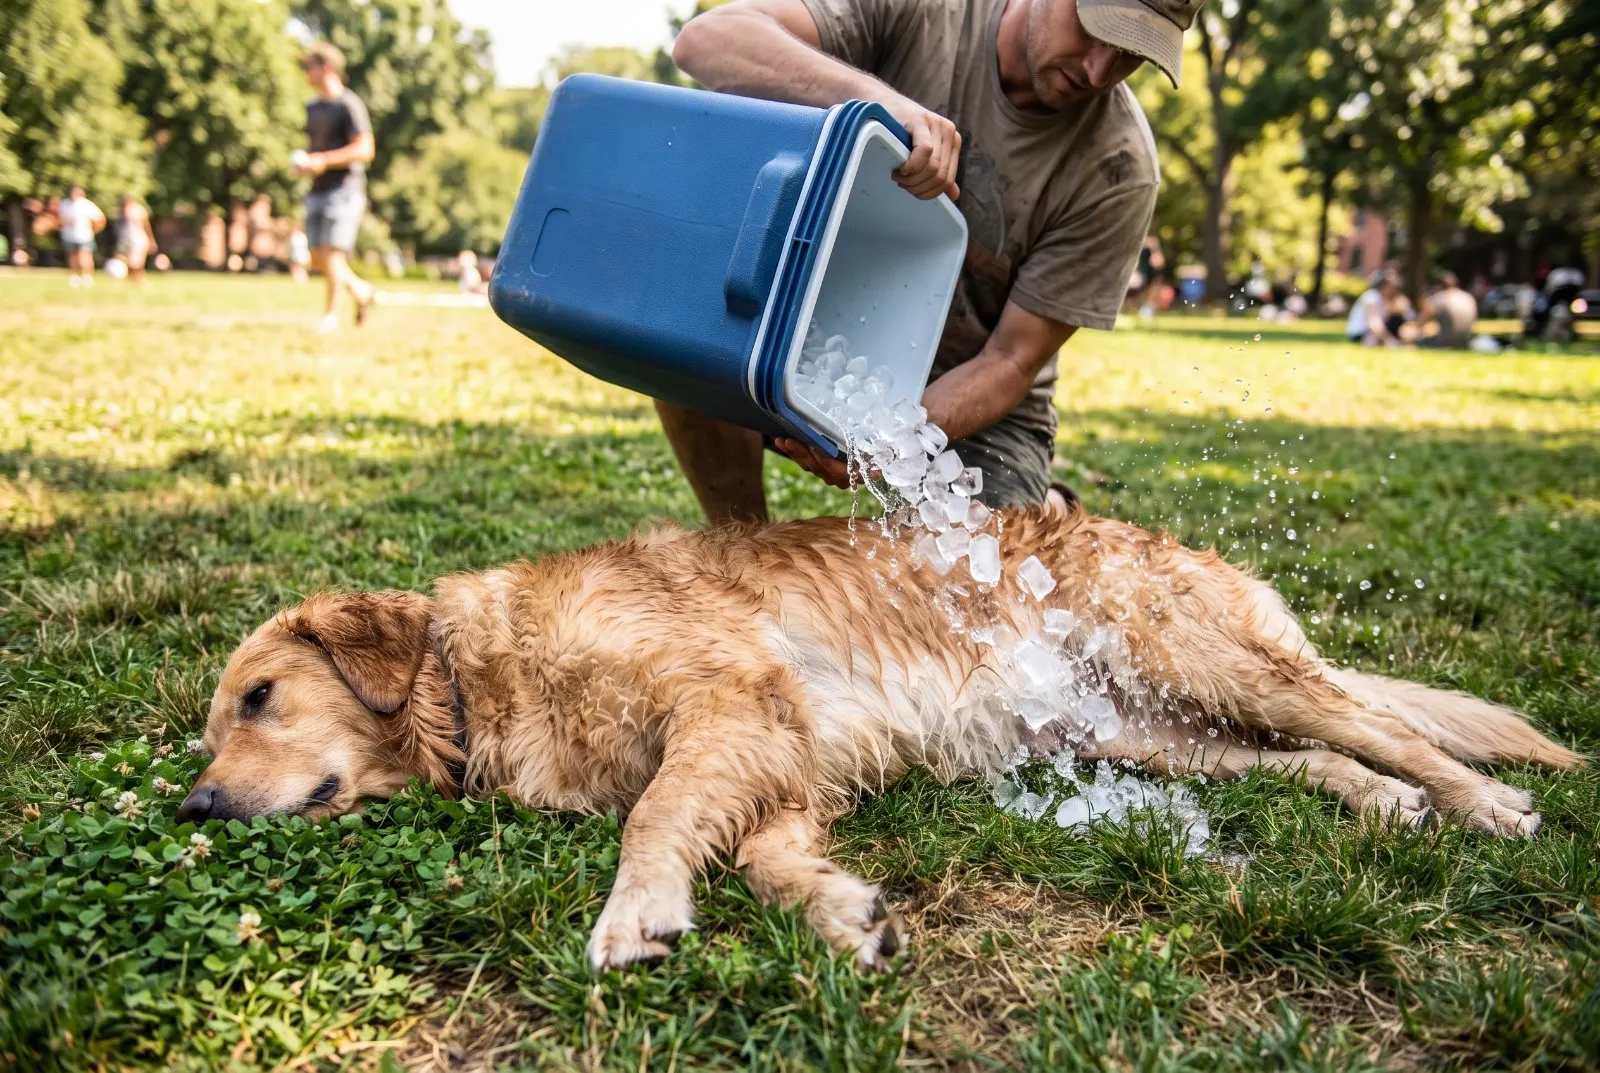 Ice water from a cool box
- Avoid the mouth — risk of accidental aspiration or drowning.
- Cooling is most effective where the coat is thinnest.
- Running water or repeated dousing works better than still water.
Mandell DC, Thawley VJ, Burkitt-Creedon JM, Fletcher DJ, Boller M, Fausak E. "RECOVER Guidelines: First Aid for Dogs and Cats. Clinical Guidelines." Journal of Veterinary Emergency and Critical Care, 2026. — Figure 5. Educational material — it does not replace veterinary help.
Illustration 3 of 6Cooling a burn with running water
20 minutes of cool running water on the burn.
Cool running water on a burn to a dog's limb — as soon as possible after the injury.
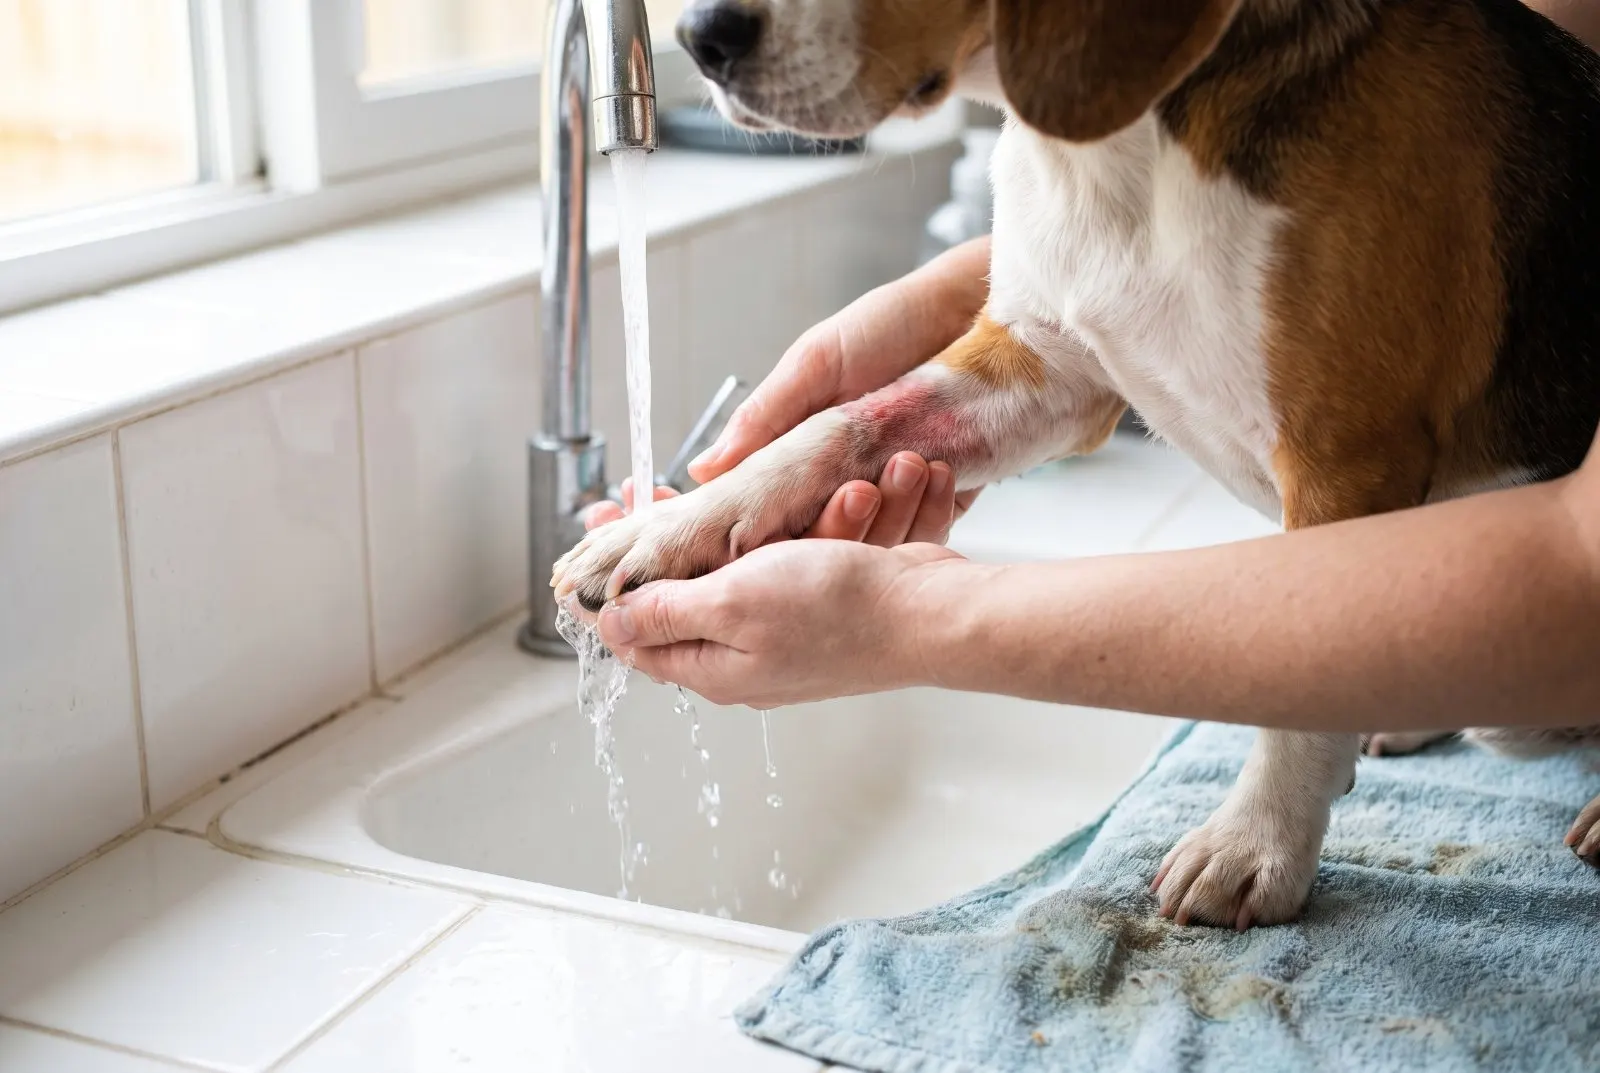 Burn
Burn- Cool the burn with cool running water (from a hose or tap) for at least 20 minutes.
- Start as soon as possible — ideally within 3 hours of the injury; the sooner, the better.
- Cool water is preferred over ice water.
- Do not use water around the mouth — risk of drowning.
- When running water is not available (for example, on the way to the practice), use a cool, damp towel or a gel pack, likewise for at least 20 minutes.
Mandell DC, Thawley VJ, Burkitt-Creedon JM, Fletcher DJ, Boller M, Fausak E. "RECOVER Guidelines: First Aid for Dogs and Cats. Clinical Guidelines." Journal of Veterinary Emergency and Critical Care, 2026. — Figure 6. Educational material — it does not replace veterinary help.
Illustration 4 of 6Recognising breathing difficulty in a dog
Body posture and signs of respiratory failure.
Body posture and signs by which respiratory failure (orthopnoea) can be recognised in a dog or cat.
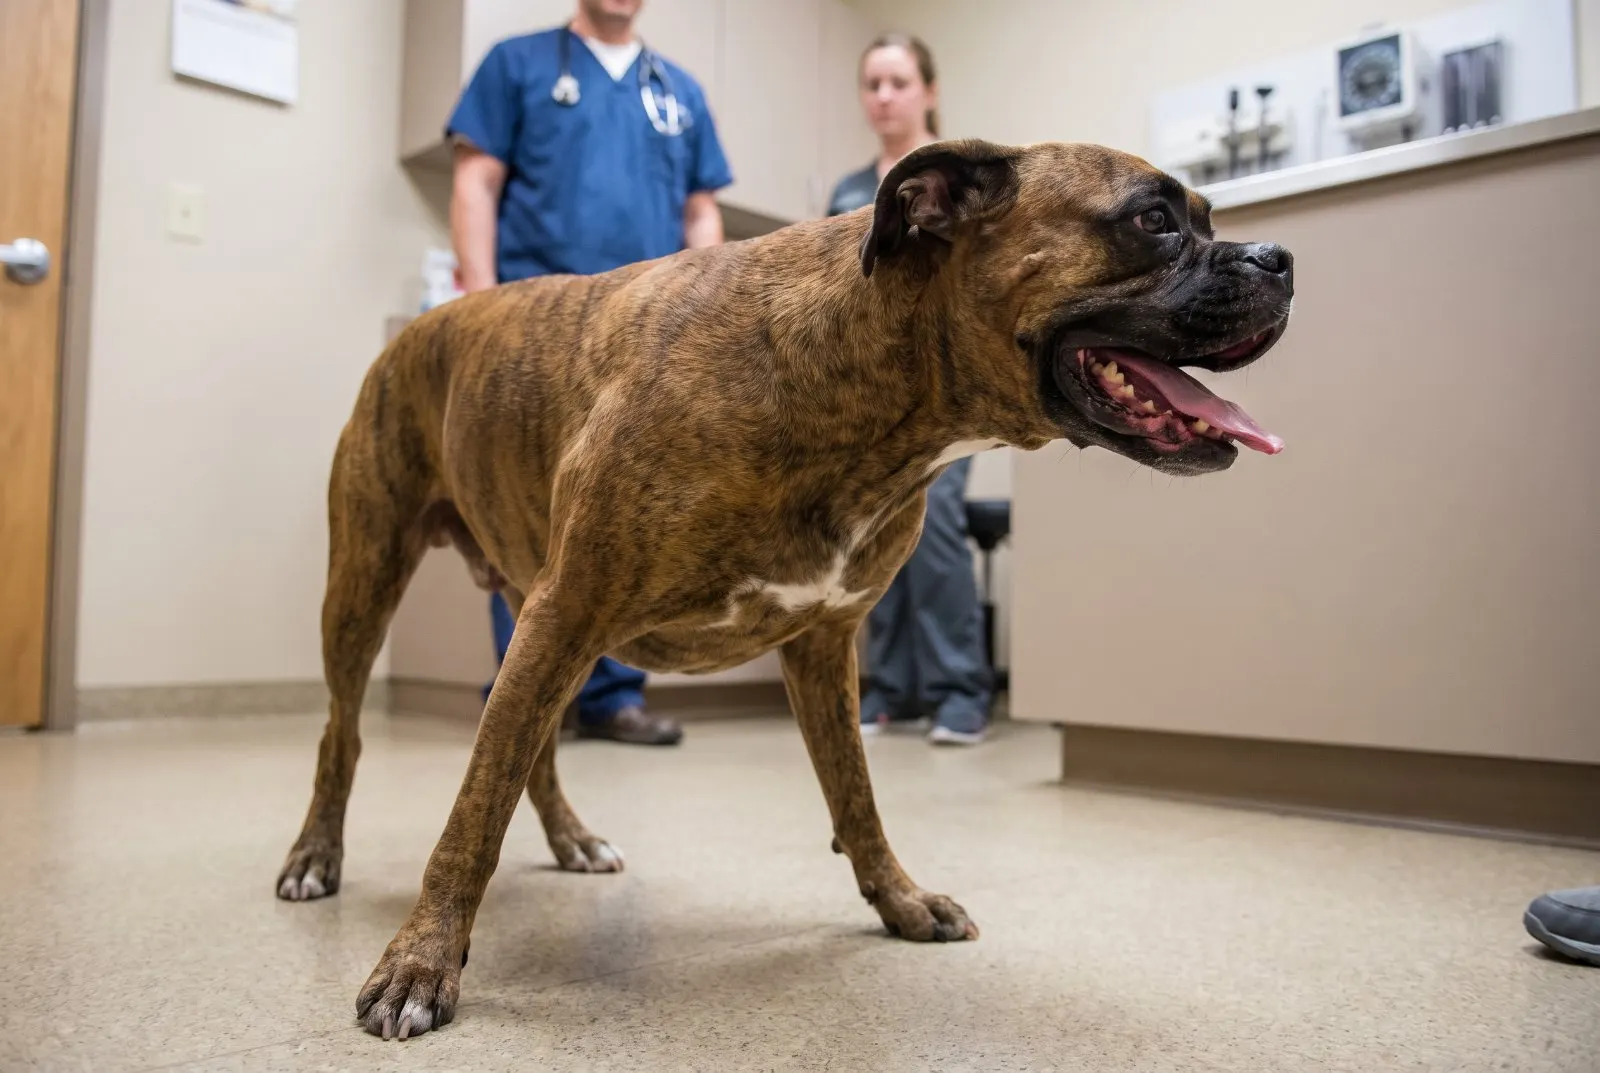 Dyspnoea
- Anxious facial expression
- Head and neck extended
- Open mouth, lips drawn back
- Elbows held away from the ribs
- Increased, exaggerated chest movements
- Position with the sternum towards the ground and the back up — a dog or cat with breathing difficulty rarely lies on its side
Mandell DC, Thawley VJ, Burkitt-Creedon JM, Fletcher DJ, Boller M, Fausak E. "RECOVER Guidelines: First Aid for Dogs and Cats. Clinical Guidelines." Journal of Veterinary Emergency and Critical Care, 2026. — Figure 7. Educational material — it does not replace veterinary help.
Illustration 5 of 6Giving a medication intranasally
Naloxone in an unconscious animal using an atomiser.
Giving a medication (for example, naloxone in suspected opioid poisoning) intranasally using an atomiser on a syringe, in an unconscious, long-nosed dog.
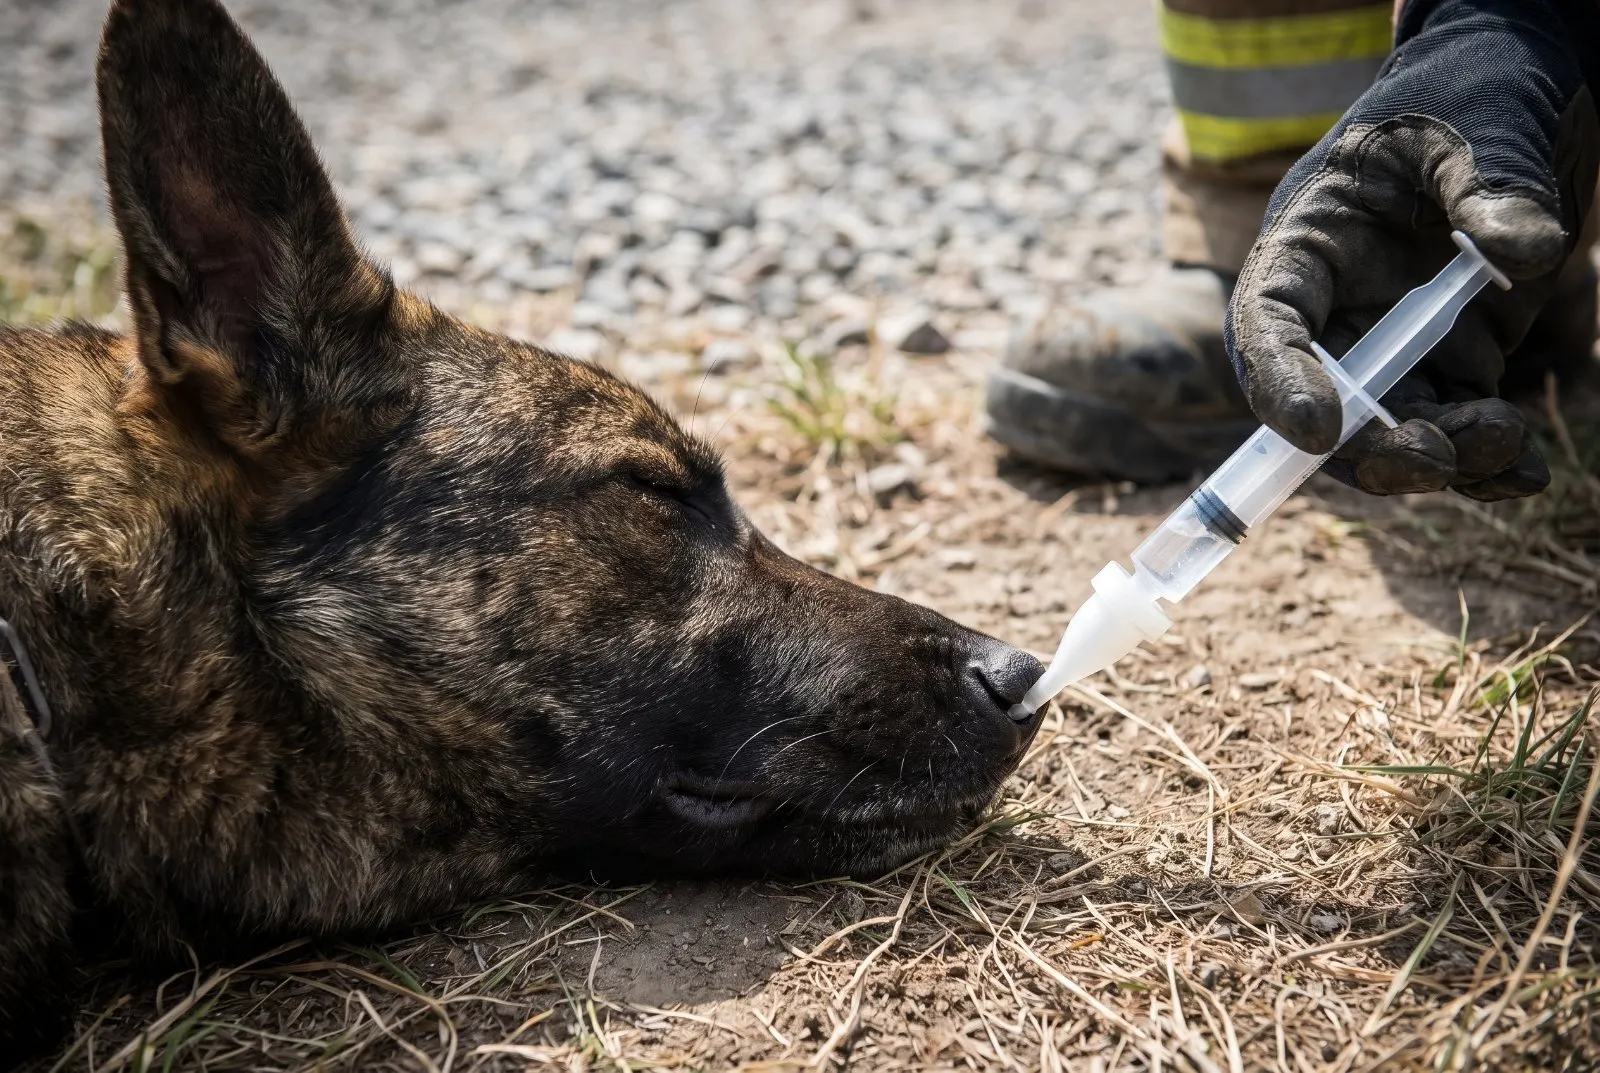 Intranasal administration
- Altered consciousness or a breathing rate below 10/min when opioid exposure is suspected.
- If the animal is unconscious, apnoeic or agonal — start CPR first, following the resuscitation algorithm, then give naloxone intranasally or intramuscularly as soon as possible.
- Do not give it if this poses a risk to the rescuer.
- Signs: loss of balance, drowsiness progressing to collapse, constricted pupils in a dog / dilated in a cat, vomiting, slow or shallow breathing, apnoea.
- Intranasally: atomiser on a syringe; the medication disperses best when it is given as the animal breathes in.
- Intramuscularly: the paraspinal muscles of the lumbar area or the lateral part of the quadriceps muscle of the thigh. Avoid the back of the thigh and the rump (sciatic nerve).
- Reasonable dose: 0,1–0,2 mg/kg (intranasally or intramuscularly).
- The animal needs veterinary assessment even after improving — the effect of the opioid may return.
Mandell DC, Thawley VJ, Burkitt-Creedon JM, Fletcher DJ, Boller M, Fausak E. "RECOVER Guidelines: First Aid for Dogs and Cats. Clinical Guidelines." Journal of Veterinary Emergency and Critical Care, 2026. — Figure 11. Educational material — it does not replace veterinary help.
Illustration 6 of 6Improvised tourniquet
Stopping severe bleeding from a limb.
A tourniquet tightened firmly on a small animal's limb, above the wound (closer to the trunk) — for severe limb bleeding that does not stop with direct pressure.
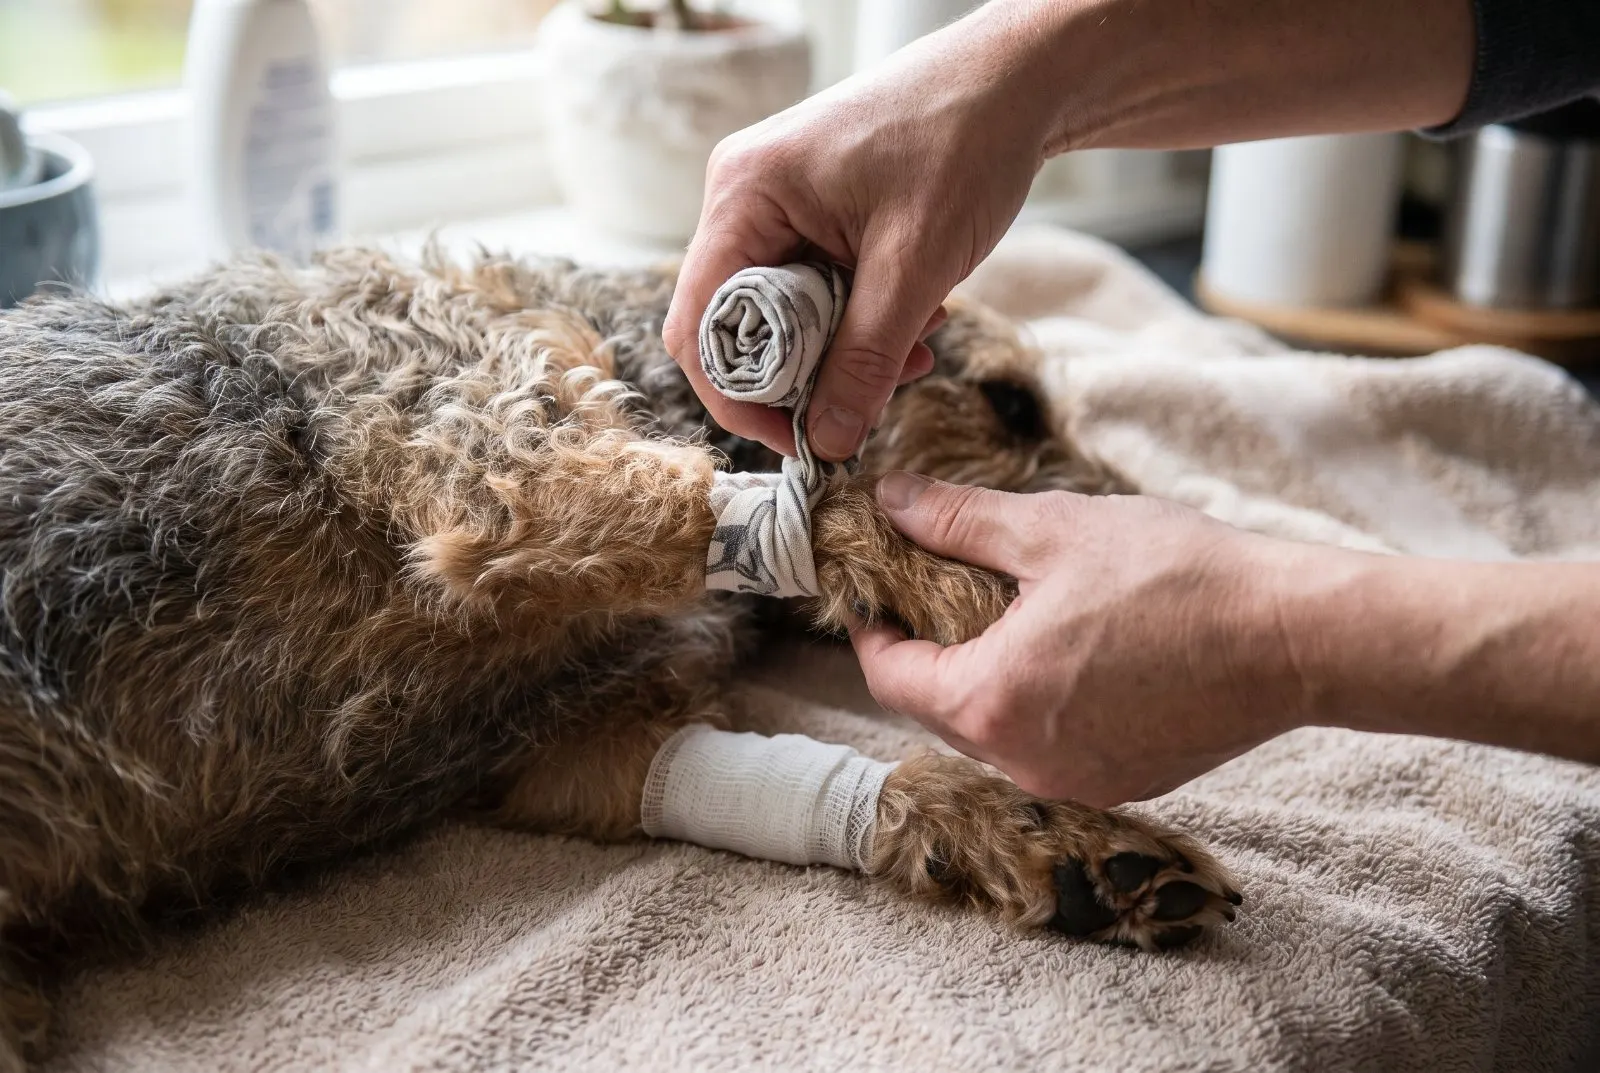 Tourniquet
- Apply a tourniquet when arterial or severe bleeding from a limb or tail does not stop with direct pressure alone. Do not apply a tourniquet to the head, neck or trunk — there, use only pressure and rapid transport.
- Use material at least 5 cm wide (a scarf or tie is easier to tighten than a belt).
- Wrap it around the limb above the wound (closer to the trunk), tie a simple knot and tighten only until the bleeding clearly slows.
- If the tourniquet slips down, loosen it, move it higher and tighten again. Secure it with an extra knot or tape. It may need tightening again on the way.
- In an unconscious animal a tourniquet is recommended; in a conscious one, suggested (risk of being bitten).
- Do not remove the tourniquet yourself — the vet will do it after assessment at the practice. Pressing on the artery with your fingers alone is ineffective.
- Do not do this if it poses a risk to the rescuer.
Mandell DC, Thawley VJ, Burkitt-Creedon JM, Fletcher DJ, Boller M, Fausak E. "RECOVER Guidelines: First Aid for Dogs and Cats. Clinical Guidelines." Journal of Veterinary Emergency and Critical Care, 2026. — Figure 12. Educational material — it does not replace veterinary help.
Compiled by HOŁDOWAŃSCY Veterinary Practice on the basis of Mandell DC, Thawley VJ, Burkitt-Creedon JM, Fletcher DJ, Boller M, Fausak E. "RECOVER Guidelines: First Aid for Dogs and Cats. Clinical Guidelines." Journal of Veterinary Emergency and Critical Care, 2026.